

3.6 - Procedural Noise
What We're Learning
So far in this series, we've worked with mathematical functions like sine waves, smooth gradients, and geometric patterns. These are powerful, but they all share a common limitation: they are too perfect. Nature isn't perfectly regular - clouds don't form in neat circles, marble doesn't have uniform veins, and terrain doesn't follow mathematical curves. To create convincing organic materials, we need controlled chaos.
This is the world of Procedural Noise.
Unlike standard random number generators that produce "static," noise functions produce smooth, rolling hills of random values. This distinction is the foundation of almost every organic effect in computer graphics.
In this article, you will learn:
Random vs. Noise: Why
rand()creates TV static, but Noise creates landscapes.The Hash Function: How to generate deterministic pseudo-randomness from coordinates.
Value vs. Gradient Noise: The evolution from blocky pixels to smooth Perlin-style noise.
Fractal Brownian Motion (FBM): Layering noise to create complex detail like coastlines or clouds.
Domain Warping: Using noise to distort other noise for liquid, gooey effects.
Calculated vs. Texture Noise: When to compute it on the fly and when to load a texture.
Random vs. Noise: Understanding the Difference
Before writing code, we must distinguish between "randomness" and "noise."
Pure Randomness (White Noise)
A standard random function (like rand()) returns unrelated values. There is no correlation between an input of 0.1 and 0.2.

In graphics, this looks like "TV static" or snow. It is useful for dissolving pixels or sparkling glitter, but it doesn't look like a physical object.
Coherent Noise
Noise functions are coherent. This means that if you input two numbers that are close to each other, the return values will also be close to each other.

Visual Comparison
If we visualize these values as a 2D grayscale image, the difference is obvious:

The Four Properties of Good Noise
To be useful in a shader, our noise function needs four specific traits:
Deterministic: The same input coordinate (x, y) must always produce the exact same output value. This ensures the terrain doesn't flicker when we move the camera.
Continuous: The transition between values must be smooth (no sharp edges).
Apparent Randomness: While it follows a pattern, it shouldn't look like a repeating pattern to the human eye.
Controllable: We need to be able to scale the frequency (how wide the features are) and amplitude (how strong the features are).
Hash Functions: The Foundation
To generate noise, we first need a source of randomness. But in a shader, we don't have a rand() function that remembers previous states. Shaders run in parallel on thousands of pixels simultaneously; they can't share state.
Instead, we use a Hash Function.
A hash function takes an input (like a coordinate) and mangles it mathematically to produce a seemingly random number.
1. The Sine-Fract Hash
The most common "quick and dirty" hash used in shader tutorials relies on the chaotic nature of the sine wave at high amplitudes.
fn hash_2d(p: vec2<f32>) -> f32 {
    // 1. Dot Product: Squash the 2D vector into a single float
    // The "magic numbers" (127.1, 311.7) are arbitrary primes chosen to avoid patterns.
    let n = dot(p, vec2<f32>(127.1, 311.7));

    // 2. Sine Chaos: Apply sine and multiply by a huge number.
    // 43758.5453 is chosen because it scrambles the bits effectively.
    // 3. Fract: Keep only the decimal part.
    return fract(sin(n) * 43758.5453123);
}
How it works:
Dot Product: We mix
xandytogether. If we just added them (x+y), the pattern would be diagonal lines. Using different weights breaks that symmetry.Sine:
sin(n)gives a wave from-1to1.Amplitude: Multiplying by
43758.54creates a wave that oscillates wildly.Fract: By taking the fractional part, we get a value between
0.0and1.0. Because the wave is oscillating so fast, moving just0.0001units in space results in a completely different decimal value.
Production Note: This sine-based hash is perfect for learning and small scenes, but it has limits. Because floating-point precision drops as numbers get larger, this function starts to show artifacts (patterns or solid blocks) at very large coordinates (e.g., p > 100,000.0). For infinite procedural worlds, developers use better hash functions (like PCG Hash) which are stable everywhere.
2. 3D Hash Function
If we are working in 3D space (like for a volumetric cloud shader), we simply add a third "magic number" to the dot product.
fn hash_3d(p: vec3<f32>) -> f32 {
    let n = dot(p, vec3<f32>(127.1, 311.7, 74.7));
    return fract(sin(n) * 43758.5453123);
}
Visualizing the Output
If we output this hash directly to the screen:
let noise = hash_2d(in.uv * 100.0);
return vec4<f32>(vec3<f32>(noise), 1.0);
We get "White Noise" - pure, unconnected static.

This is our raw material. To make it organic, we need to interpolate it.
Value Noise: Interpolating Random Values
The simplest form of procedural noise is Value Noise.
The concept is straightforward: imagine an infinite grid (like graph paper).
At every intersection (integer coordinate), we generate a random value using our Hash function.
For any point between the intersections, we smoothly blend the values of the four nearest corners.
The Concept

To find the value at point P:
Identify the 4 corners.
Hash them to get the random values (0.3, 0.9, 0.8, 0.2).
Blend based on how close
Pis to each corner.
Implementation
Here is the complete WGSL function for 2D Value Noise.
fn value_noise_2d(p: vec2<f32>) -> f32 {
    // 1. Grid Identification
    // floor(p) gives us the integer coordinate of the bottom-left corner.
    let i = floor(p);
    // fract(p) gives us the position within the grid square (0.0 to 1.0).
    let f = fract(p);

    // 2. Hash the 4 Corners
    // We add specific offsets to 'i' to get the 4 neighbor coordinates.
    let v00 = hash_2d(i + vec2<f32>(0.0, 0.0)); // Bottom-Left
    let v10 = hash_2d(i + vec2<f32>(1.0, 0.0)); // Bottom-Right
    let v01 = hash_2d(i + vec2<f32>(0.0, 1.0)); // Top-Left
    let v11 = hash_2d(i + vec2<f32>(1.0, 1.0)); // Top-Right

    // 3. Smooth Interpolation Curve
    // If we just used 'f' directly, we'd get linear mixing (pointy mountains).
    // We use a "Smoothstep" curve (Hermite interpolation) to round off the edges.
    // Formula: 3x^2 - 2x^3
    let u = f * f * (3.0 - 2.0 * f);

    // 4. Bilinear Interpolation (Mixing)
    // First, mix the bottom two corners horizontally
    let mix_bottom = mix(v00, v10, u.x);
    // Next, mix the top two corners horizontally
    let mix_top    = mix(v01, v11, u.x);
    // Finally, mix those two results vertically
    return mix(mix_bottom, mix_top, u.y);
}
Why the "Smooth" Step Matters
In step 3, we modified our interpolation factor f to create u. Why not just use f?
Linear Mix (
f): Creates sharp, diamond-shaped artifacts. The gradient changes abruptly at grid lines. It looks like a low-poly terrain.Smooth Mix (
u): Creates an "S-curve." It starts slow, speeds up in the middle, and slows down at the end. This ensures the slope of the noise is zero at the grid boundaries, making the transition to the next grid cell invisible.

Characteristics of Value Noise
Pros: Very cheap to calculate. Easy to understand.
Cons: It tends to look "blocky" or "square-ish" because the random values are aligned to a strict grid. Even with smoothing, your eye can often detect the underlying squares.
To fix the "blockiness," we need something smarter: Gradient Noise.
Gradient Noise: Perlin-Style Smoothness
To solve the blocky look of Value Noise, Ken Perlin invented Gradient Noise (often called Perlin Noise).
The Key Difference
In Value Noise, we assigned a random height (0.0 to 1.0) to each grid corner.
In Gradient Noise, we assign a random slope (direction vector) to each grid corner.

Instead of simply interpolating the height, we calculate the height based on where the slope "points."
If the slope at a corner points towards our pixel, the value increases.
If it points away, the value decreases.
This results in a structure that naturally rises and falls like waves, hiding the underlying grid structure much better than Value Noise.
Implementation
Implementing Gradient Noise is slightly more complex. We need a helper function to turn our hash into a random unit vector.
// Helper: Turn a grid coordinate into a random unit vector
fn random_gradient_2d(cell: vec2<f32>) -> vec2<f32> {
    // 1. Get a random angle (0 to 2PI)
    let random = hash_2d(cell);
    let angle = random * 6.283185307; // 2 * PI

    // 2. Convert angle to a vector (x, y)
    return vec2<f32>(cos(angle), sin(angle));
}

fn gradient_noise_2d(p: vec2<f32>) -> f32 {
    // 1. Grid Identification (Same as Value Noise)
    let i = floor(p);
    let f = fract(p);

    // 2. Get smooth interpolation weights (The S-Curve)
    let u = f * f * (3.0 - 2.0 * f);

    // 3. Calculate the 4 corners
    // For each corner, we do two things:
    //   a. Get the random gradient vector (g)
    //   b. Get the distance vector from corner to pixel (d)
    //   c. Dot product (g . d) determines the value contribution

    // Bottom-Left
    let g00 = random_gradient_2d(i + vec2<f32>(0.0, 0.0));
    let d00 = f - vec2<f32>(0.0, 0.0);
    let v00 = dot(g00, d00);

    // Bottom-Right
    let g10 = random_gradient_2d(i + vec2<f32>(1.0, 0.0));
    let d10 = f - vec2<f32>(1.0, 0.0);
    let v10 = dot(g10, d10);

    // Top-Left
    let g01 = random_gradient_2d(i + vec2<f32>(0.0, 1.0));
    let d01 = f - vec2<f32>(0.0, 1.0);
    let v01 = dot(g01, d01);

    // Top-Right
    let g11 = random_gradient_2d(i + vec2<f32>(1.0, 1.0));
    let d11 = f - vec2<f32>(1.0, 1.0);
    let v11 = dot(g11, d11);

    // 4. Bilinear Interpolation
    // Blend the dot product results
    let mix_bottom = mix(v00, v10, u.x);
    let mix_top    = mix(v01, v11, u.x);
    let result     = mix(mix_bottom, mix_top, u.y);

    // 5. Normalization
    // The result of the dot products is roughly between -0.7 and 0.7.
    // We map it to 0.0 -> 1.0 for easier use in colors.
    return result * 0.5 + 0.5;
}
3D Gradient Noise
The concept extends perfectly to 3D. Instead of a square with 4 corners, we use a cube with 8 corners. We generate 3D gradient vectors for each corner, calculate dot products, and use trilinear interpolation (mix X, then mix Y, then mix Z).
This is the standard noise used for volumetric clouds, smoke, and marble.
Pro Tip: Simplex Noise
You might hear about "Simplex Noise." It is an improvement on Perlin Noise that uses a triangular grid (triangles/tetrahedrons) instead of squares/cubes. It is faster in high dimensions and has fewer artifacts. However, the math is significantly harder to implement from scratch. For most game effects, standard Gradient Noise is perfectly sufficient and easier to debug.
Fractal Brownian Motion (FBM)
Single-layer noise is smooth, but it looks like "blobs." It lacks the gritty detail of real nature.
Real terrain has large mountains, medium boulders, small rocks, and tiny pebbles.
To mimic this, we use Fractal Brownian Motion (FBM).
FBM isn't a new type of noise; it's a technique of layering noise. We stack multiple layers (called Octaves) of noise on top of each other.
The Formula
For each new layer, we change two things:
Frequency: We zoom out (multiply the coordinate). Usually doubled (
x2).Amplitude: We reduce the strength. Usually halved (
x0.5).

Implementation
fn fbm_noise(p: vec2<f32>, octaves: u32) -> f32 {
    var value = 0.0;
    var amplitude = 0.5;
    var frequency = 1.0;

    // Loop through the octaves
    for (var i = 0u; i < octaves; i++) {
        // Sample the noise
        value += amplitude * gradient_noise_2d(p * frequency);

        // Prepare for next layer
        frequency *= 2.0; // "Lacunarity": How fast frequency grows
        amplitude *= 0.5; // "Gain": How fast amplitude shrinks
    }

    return value;
}
FBM Parameters
You can tweak the "feel" of the noise by changing the multipliers:
Lacunarity (Frequency multiplier): Controls how "busy" the detail is. Higher values (e.g., 3.0) make the detail look more scattered.
Gain (Amplitude multiplier): Controls "roughness."
0.5: Standard "cloudy" look.0.8: Very rough, noisy look (good for rocks).0.3: Very smooth, subtle detail (good for water).
Specialized FBM: Turbulence
If we take the absolute value of the noise abs(noise) before adding it, we turn the smooth valleys into sharp creases. This creates a "Ridged" look, perfect for fire, lightning, or marble veins.
// Turbulence: Sharp valleys
value += amplitude * abs(gradient_noise_2d(p * frequency));
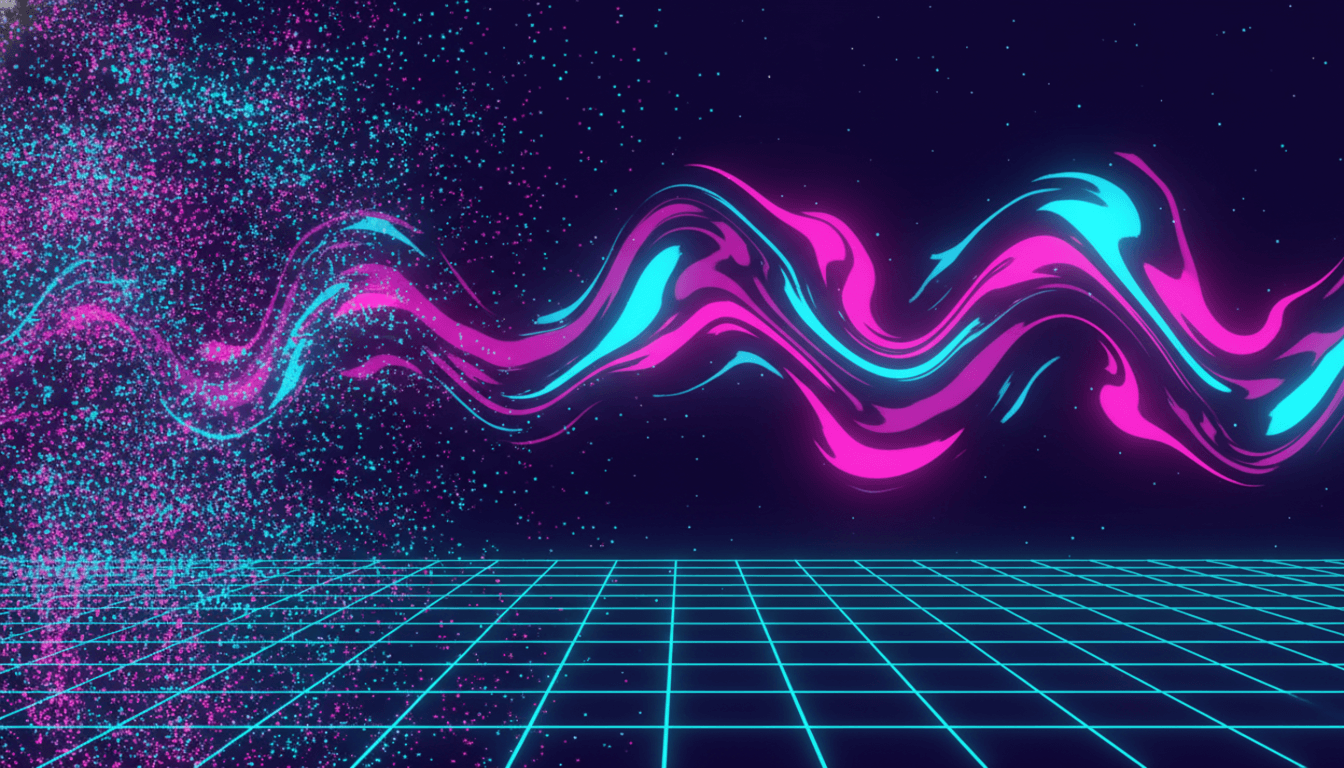
Domain Warping
If FBM is the tool for adding detail, Domain Warping is the tool for adding "flow." It is the secret technique behind liquid, surreal, and highly organic effects.
The concept is meta: Use the output of one noise function to distort the input coordinates of another.
fn domain_warp(p: vec2<f32>) -> f32 {
    // 1. Create a vector based on noise
    let offset = vec2<f32>(
        gradient_noise_2d(p),
        gradient_noise_2d(p + 5.2) // Offset to get a different random value
    );

    // 2. Distort the original coordinate 'p' by this noisy offset
    // The multiplier (4.0) controls the strength of the warp
    let warped_p = p + offset * 4.0;

    // 3. Sample noise at the new, warped location
    return gradient_noise_2d(warped_p);
}
Visualizing the effect:
Imagine a pattern of straight stripes.
Standard Noise: The stripes get brighter and darker, but stay straight.
Domain Warping: The stripes bend, twist, and swirl like oil paint on water.
This technique is essential for effects like smoke, fire, marble, and psychedelic backgrounds.
Texture-Based vs. Calculated Noise
In game development, you have two ways to get noise into your shader. Knowing which to choose is a critical optimization skill.
1. Calculated Noise (What we just learned)
We compute the noise math inside the shader, on the fly, for every pixel.
✅ Pros: Infinite resolution. No pixels ever. You can animate it easily by adding
timeto the coordinates. 3D noise costs no memory.❌ Cons: Expensive. Calculating FBM with 6 octaves requires dozens of math operations per pixel. Heavy use can drop your frame rate, especially on mobile GPUs.
2. Texture-Based Noise
We generate the noise offline (in Photoshop or code), save it as a seamlessly tiling PNG texture, and sample it.
✅ Pros: Extremely fast. It's just one memory lookup (
textureSample).❌ Cons: Finite resolution. If you get too close, you see pixels (unless you mix in expensive texture filtering). Repetition can be obvious.
The Hybrid "Pro" Approach
Triple-A games often combine both:
Use a Noise Texture for the base shape (low frequency). This is fast and covers the bulk of the work.
Add Calculated Noise for the tiny details (high frequency) on top.
Since the tiny details are small, you often only need 1 or 2 octaves of calculated noise to make the texture look infinite, saving massive amounts of GPU power compared to calculating the whole thing.
Recipes: Organic Patterns
Before we build the final demo, here are the "recipes" for common materials. These are just logical combinations of the functions we've built.
Wood
Wood is composed of rings (distance from a center line) distorted by noise.
// 1. Basic Ring Pattern
let dist = length(p.xy);     // Distance from center
let rings = sin(dist * 20.0); // Concentric rings

// 2. Make it Organic
// Add noise to the coordinate BEFORE calculating distance
let noise = gradient_noise_3d(p);
let dist = length(p.xy + noise * 0.5); // Distorted distance
let wood_grain = sin(dist * 20.0);
Marble
Marble is smooth rock with sharp veins. We use Turbulence (absolute value of noise) to create the veins, and use the sine function to create layers.
let noise = turbulence(p * 2.0);
// Distortion creates the "veins" through the sine wave layers
let marble = sin(p.x * 10.0 + noise * 5.0);
Clouds
Clouds are simply FBM masked by a density threshold.
let density = fbm_noise(p, 6u);
// Smoothstep clears out the low-density "wisps" to create empty sky
let cloud = smoothstep(0.4, 0.8, density);
Complete Example: Animated Procedural Clouds
We will build a shader that renders a dynamic, wind-blown sky. It uses:
Gradient Noise for the base.
FBM to create fluffy detail.
Domain Warping to make the clouds drift and morph organically.
Time-based animation for wind.
Our Goal
A sky quad where clouds drift, morph, and interact with a "sun" light direction.
The Shader (assets/shaders/d03_06_procedural_clouds.wgsl)
Note on Imports: In a real project, you would put the noise functions in a file like
assets/shaders/noise_utils.wgsland import them using#import "shaders/noise_utils.wgsl"::hash_2d. For this tutorial, we include them in the same file to make copy-pasting easier.
#import bevy_pbr::forward_io::VertexOutput

struct CloudMaterial {
    time: f32,
    cloud_scale: f32,
    cloud_speed: f32,
    density_threshold: f32,
    octaves: u32,
    // Colors
    sky_color_a: vec4<f32>,
    sky_color_b: vec4<f32>,
    cloud_color: vec4<f32>,
}

@group(2) @binding(0)
var<uniform> material: CloudMaterial;

// --- NOISE LIBRARY START ---

fn hash_2d(p: vec2<f32>) -> f32 {
    let n = dot(p, vec2<f32>(127.1, 311.7));
    return fract(sin(n) * 43758.5453123);
}

fn noise_2d(p: vec2<f32>) -> f32 {
    let i = floor(p);
    let f = fract(p);

    // Four corners
    let a = hash_2d(i);
    let b = hash_2d(i + vec2<f32>(1.0, 0.0));
    let c = hash_2d(i + vec2<f32>(0.0, 1.0));
    let d = hash_2d(i + vec2<f32>(1.0, 1.0));

    // Smooth interpolation
    let u = f * f * (3.0 - 2.0 * f);

    // Mix
    return mix(mix(a, b, u.x), mix(c, d, u.x), u.y);
}

// Simple FBM
fn fbm(p: vec2<f32>, octaves: u32) -> f32 {
    var value = 0.0;
    var amp = 0.5;
    var freq = 1.0;

    for(var i = 0u; i < octaves; i++) {
        value += amp * noise_2d(p * freq);
        freq *= 2.0;
        amp *= 0.5;
    }
    return value;
}

// --- NOISE LIBRARY END ---

@fragment
fn fragment(in: VertexOutput) -> @location(0) vec4<f32> {
    // 1. Correct UVs to be centered and proportional
    let uv = in.uv * material.cloud_scale;

    // 2. Animate coordinates (Wind)
    let wind = vec2<f32>(material.time * material.cloud_speed, material.time * material.cloud_speed * 0.2);
    let p = uv + wind;

    // 3. Domain Warping
    // We use low-frequency noise to distort the input of the high-freq FBM
    let q = vec2<f32>(
        fbm(p, material.octaves),
        fbm(p + vec2<f32>(5.2, 1.3), material.octaves)
    );

    // The actual cloud density calculation
    // We warp 'p' by adding 'q'
    let density = fbm(p + q * 1.5, material.octaves);

    // 4. Shaping the Clouds
    // Use smoothstep to create defined cloud shapes vs empty sky
    let cloud_mask = smoothstep(material.density_threshold, material.density_threshold + 0.2, density);

    // 5. Coloring
    // Gradient sky background
    let sky = mix(material.sky_color_a, material.sky_color_b, in.uv.y);

    // Mix sky with cloud color
    // We add a subtle highlight based on the density derivative for fake depth
    let final_color = mix(sky, material.cloud_color, cloud_mask);

    return final_color;
}
The Rust Material (src/materials/d03_06_procedural_clouds.rs)
We map the Rust struct to the WGSL struct. Note that vec4<f32> in WGSL requires 16-byte alignment. Bevy's ShaderType derive macro handles the padding between the u32 (octaves) and the first color automatically, ensuring the data aligns correctly in the GPU buffer.
use bevy::prelude::*;
use bevy::render::render_resource::{AsBindGroup, ShaderRef};

pub mod uniforms {
    #![allow(dead_code)]
    use bevy::prelude::*;
    use bevy::render::render_resource::ShaderType;

    #[derive(ShaderType, Debug, Clone)]
    pub struct CloudMaterialUniforms {
        pub time: f32,
        pub cloud_scale: f32,
        pub cloud_speed: f32,
        pub density_threshold: f32,
        pub octaves: u32,
        pub sky_color_a: LinearRgba,
        pub sky_color_b: LinearRgba,
        pub cloud_color: LinearRgba,
    }
}

use uniforms::CloudMaterialUniforms;

#[derive(Asset, TypePath, AsBindGroup, Debug, Clone)]
pub struct CloudMaterial {
    #[uniform(0)]
    pub uniforms: CloudMaterialUniforms,
}

impl Default for CloudMaterial {
    fn default() -> Self {
        Self {
            uniforms: CloudMaterialUniforms {
                time: 0.0,
                cloud_scale: 3.5,
                cloud_speed: 0.2,
                density_threshold: 0.5,
                octaves: 4,
                sky_color_a: LinearRgba::new(0.0, 0.4, 0.8, 1.0), // Deep Blue
                sky_color_b: LinearRgba::new(0.4, 0.7, 1.0, 1.0), // Cyan
                cloud_color: LinearRgba::new(1.0, 1.0, 1.0, 1.0), // White
            },
        }
    }
}

impl Material for CloudMaterial {
    fn fragment_shader() -> ShaderRef {
        "shaders/d03_06_procedural_clouds.wgsl".into()
    }
}
Don't forget to add it to src/materials/mod.rs:
pub mod d03_06_procedural_clouds;
The Demo Module (src/demos/d03_06_procedural_clouds.rs)
This demo sets up a live environment where you can tune the noise parameters. Seeing how octaves affects detail or how density_threshold changes the cloud cover in real-time is the best way to understand the math.
use crate::materials::d03_06_procedural_clouds::CloudMaterial;
use bevy::prelude::*;

pub fn run() {
    App::new()
        .add_plugins(DefaultPlugins)
        .add_plugins(MaterialPlugin::<CloudMaterial>::default())
        .add_systems(Startup, setup)
        .add_systems(Update, (update_time, handle_input, update_ui))
        .run();
}

fn setup(
    mut commands: Commands,
    mut meshes: ResMut<Assets<Mesh>>,
    mut materials: ResMut<Assets<CloudMaterial>>,
) {
    commands.spawn((Camera3d::default(), Transform::from_xyz(0.0, 0.0, 2.0)));

    commands.spawn((
        Mesh3d(meshes.add(Rectangle::new(2.0, 2.0))),
        MeshMaterial3d(materials.add(CloudMaterial::default())),
        Transform::default(),
    ));

    // UI Information
    commands.spawn((
        Text::new("Procedural Clouds Demo"),
        Node {
            position_type: PositionType::Absolute,
            top: Val::Px(12.0),
            left: Val::Px(12.0),
            ..default()
        },
        TextFont {
            font_size: 16.0,
            ..default()
        },
        TextColor(Color::WHITE),
        BackgroundColor(Color::srgba(0.0, 0.0, 0.0, 0.7)),
    ));
}

fn update_time(time: Res<Time>, mut materials: ResMut<Assets<CloudMaterial>>) {
    for (_, material) in materials.iter_mut() {
        material.uniforms.time = time.elapsed_secs();
    }
}

fn handle_input(keyboard: Res<ButtonInput<KeyCode>>, mut materials: ResMut<Assets<CloudMaterial>>) {
    for (_, material) in materials.iter_mut() {
        let u = &mut material.uniforms;

        // Density
        if keyboard.pressed(KeyCode::ArrowUp) {
            u.density_threshold = (u.density_threshold + 0.01).min(1.0);
        }
        if keyboard.pressed(KeyCode::ArrowDown) {
            u.density_threshold = (u.density_threshold - 0.01).max(0.0);
        }

        // Scale
        if keyboard.pressed(KeyCode::ArrowRight) {
            u.cloud_scale += 0.05;
        }
        if keyboard.pressed(KeyCode::ArrowLeft) {
            u.cloud_scale = (u.cloud_scale - 0.05).max(0.1);
        }

        // Octaves (Integer steps)
        if keyboard.just_pressed(KeyCode::KeyO) {
            u.octaves = u.octaves.saturating_sub(1).max(1);
        }
        if keyboard.just_pressed(KeyCode::KeyP) {
            u.octaves = (u.octaves + 1).min(8);
        }
    }
}

fn update_ui(materials: Res<Assets<CloudMaterial>>, mut text_query: Query<&mut Text>) {
    if let Some((_, mat)) = materials.iter().next() {
        let u = &mat.uniforms;
        for mut text in text_query.iter_mut() {
            **text = format!(
                "CONTROLS:\n\
                [Up/Down] Density Threshold: {:.2}\n\
                [Left/Right] Scale: {:.2}\n\
                [O/P] Octaves: {}\n\
                (Watch the detail change with Octaves!)",
                u.density_threshold, u.cloud_scale, u.octaves
            );
        }
    }
}
Don't forget to add it to src/demos/mod.rs:
pub mod d03_06_procedural_clouds;
And register it in src/main.rs:
Demo {
    number: "3.6a",
    title: "Procedural Noise - Clouds",
    run: demos::d03_06_procedural_clouds::run,
},
Running the Demo
Controls
| Key | Action | Description |
| Up / Down | Adjust Density | Controls the "cutoff" point. Higher values erode the clouds; lower values fill the sky. |
| Left / Right | Adjust Scale | Zooms the noise coordinate system in or out. |
| O / P | Change Octaves | Add or remove layers of detail. Watch the FPS if you go too high! |
What You're Seeing

The Drift: The clouds move continuously because we add
timeto the UVs.The Shape: It doesn't look like a repeating texture. It looks organic because of Domain Warping.
The Edges: The
smoothstepcreates soft, fluffy edges instead of hard cutouts.Detail Levels: Press 'O' until Octaves = 1. You will see blurry, shapeless blobs. Press 'P' up to 4 or 5, and notice how the tiny, gritty details appear on the edges. That is FBM in action.
Bonus Mini-Project: Procedural Marble
While clouds use 2D noise to manipulate UVs, solid materials like marble, wood, or stone use 3D noise based on World Position. This ensures that the texture wraps perfectly around the object without seams, stretching, or UV mapping headaches.
This technique is often called Solid Texturing. Imagine carving your object out of a solid block of wood or stone; the grain exists inside the object, not just painted on the surface.
The Shader (assets/shaders/procedural_marble.wgsl)
#import bevy_pbr::forward_io::VertexOutput

struct MarbleMaterial {
    vein_frequency: f32,
    roughness: f32,
    vein_color: vec4<f32>,
    base_color: vec4<f32>,
}

@group(2) @binding(0)
var<uniform> material: MarbleMaterial;

// --- 3D NOISE FUNCTIONS ---

fn hash_3d(p: vec3<f32>) -> f32 {
    let n = dot(p, vec3<f32>(127.1, 311.7, 74.7));
    return fract(sin(n) * 43758.5453123);
}

fn noise_3d(p: vec3<f32>) -> f32 {
    let i = floor(p);
    let f = fract(p);

    // Smooth interpolation (S-Curve)
    let u = f * f * (3.0 - 2.0 * f);

    // 8 Corners of the cube
    let a = hash_3d(i + vec3<f32>(0.0, 0.0, 0.0));
    let b = hash_3d(i + vec3<f32>(1.0, 0.0, 0.0));
    let c = hash_3d(i + vec3<f32>(0.0, 1.0, 0.0));
    let d = hash_3d(i + vec3<f32>(1.0, 1.0, 0.0));
    let e = hash_3d(i + vec3<f32>(0.0, 0.0, 1.0));
    let f_ = hash_3d(i + vec3<f32>(1.0, 0.0, 1.0)); // 'f' is reserved
    let g = hash_3d(i + vec3<f32>(0.0, 1.0, 1.0));
    let h = hash_3d(i + vec3<f32>(1.0, 1.0, 1.0));

    // Trilinear Mix
    let mix_1 = mix(mix(a, b, u.x), mix(c, d, u.x), u.y);
    let mix_2 = mix(mix(e, f_, u.x), mix(g, h, u.x), u.y);
    return mix(mix_1, mix_2, u.z);
}

// Turbulence: Sum of absolute noise values
fn turbulence(p: vec3<f32>, octaves: u32) -> f32 {
    var value = 0.0;
    var amp = 0.5;
    var freq = 1.0;

    for(var i = 0u; i < octaves; i++) {
        // abs() creates the sharp ridges for veins
        value += amp * abs(noise_3d(p * freq));
        freq *= 2.0;
        amp *= 0.5;
    }
    return value;
}

@fragment
fn fragment(in: VertexOutput) -> @location(0) vec4<f32> {
    // Solid Texturing: Use world position.
    let p = in.world_position.xyz;

    // 1. Calculate Turbulence
    let t = turbulence(p * material.roughness, 4u);

    // 2. Domain Warping the Sine Wave
    // Standard marble formula: sin(x + turbulence)
    // The sine wave creates layers; the turbulence distorts them.
    let pattern = sin(p.x * material.vein_frequency + t * 4.0);

    // 3. Map -1.0 to 1.0 range -> 0.0 to 1.0 range
    let mask = pattern * 0.5 + 0.5;

    // 4. Sharpen the veins
    let sharp_mask = pow(mask, 4.0);

    return mix(material.vein_color, material.base_color, sharp_mask);
}
The Rust Material (src/materials/procedural_marble.rs)
use bevy::prelude::*;
use bevy::render::render_resource::{AsBindGroup, ShaderRef};

pub mod uniforms {
    #![allow(dead_code)]
    use bevy::prelude::*;
    use bevy::render::render_resource::ShaderType;

    #[derive(ShaderType, Debug, Clone)]
    pub struct MarbleMaterialUniforms {
        pub vein_frequency: f32,
        pub roughness: f32,
        pub vein_color: LinearRgba,
        pub base_color: LinearRgba,
    }
}

use uniforms::MarbleMaterialUniforms;

#[derive(Asset, TypePath, AsBindGroup, Debug, Clone)]
pub struct MarbleMaterial {
    #[uniform(0)]
    pub uniforms: MarbleMaterialUniforms,
}

impl Default for MarbleMaterial {
    fn default() -> Self {
        Self {
            uniforms: MarbleMaterialUniforms {
                vein_frequency: 10.0,
                roughness: 1.5,
                vein_color: LinearRgba::new(0.1, 0.1, 0.1, 1.0),
                base_color: LinearRgba::new(0.9, 0.9, 0.85, 1.0),
            },
        }
    }
}

impl Material for MarbleMaterial {
    fn fragment_shader() -> ShaderRef {
        "shaders/procedural_marble.wgsl".into()
    }
}
Don't forget to add it to src/materials/mod.rs:
pub mod procedural_marble;
The Demo Module (src/demos/procedural_marble.rs)
use crate::materials::procedural_marble::MarbleMaterial;
use bevy::prelude::*;

pub fn run() {
    App::new()
        .add_plugins(DefaultPlugins)
        .add_plugins(MaterialPlugin::<MarbleMaterial>::default())
        .add_systems(Startup, setup)
        .add_systems(Update, (handle_input, update_ui))
        .run();
}

#[derive(Component)]
struct Movable;

fn setup(
    mut commands: Commands,
    mut meshes: ResMut<Assets<Mesh>>,
    mut materials: ResMut<Assets<MarbleMaterial>>,
) {
    commands.spawn((
        Camera3d::default(),
        Transform::from_xyz(0.0, 2.0, 4.0).looking_at(Vec3::ZERO, Vec3::Y),
    ));

    // Shared material handle ensures settings apply to both objects
    let material = materials.add(MarbleMaterial::default());

    // 1. Stationary Cube (The "Base")
    commands.spawn((
        Mesh3d(meshes.add(Cuboid::new(2.0, 2.0, 2.0))),
        MeshMaterial3d(material.clone()),
        Transform::from_xyz(-1.2, 0.0, 0.0),
    ));

    // 2. Movable Sphere (The "Rover")
    commands.spawn((
        Mesh3d(meshes.add(Sphere::new(1.2))),
        MeshMaterial3d(material),
        Transform::from_xyz(1.2, 0.0, 0.0),
        Movable,
    ));

    commands.spawn((
        Text::new("Marble Demo"),
        Node {
            position_type: PositionType::Absolute,
            top: Val::Px(12.0),
            left: Val::Px(12.0),
            ..default()
        },
    ));
}

fn handle_input(
    time: Res<Time>,
    keyboard: Res<ButtonInput<KeyCode>>,
    mut materials: ResMut<Assets<MarbleMaterial>>,
    mut query: Query<&mut Transform, With<Movable>>,
) {
    // Material Controls
    for (_, material) in materials.iter_mut() {
        let u = &mut material.uniforms;
        if keyboard.pressed(KeyCode::KeyW) {
            u.vein_frequency += 0.1;
        }
        if keyboard.pressed(KeyCode::KeyS) {
            u.vein_frequency = (u.vein_frequency - 0.1).max(0.0);
        }
    }

    // Movement Controls
    let speed = 2.0 * time.delta_secs();
    for mut transform in query.iter_mut() {
        if keyboard.pressed(KeyCode::ArrowLeft) {
            transform.translation.x -= speed;
        }
        if keyboard.pressed(KeyCode::ArrowRight) {
            transform.translation.x += speed;
        }
        if keyboard.pressed(KeyCode::ArrowUp) {
            transform.translation.z -= speed;
        }
        if keyboard.pressed(KeyCode::ArrowDown) {
            transform.translation.z += speed;
        }
    }
}

fn update_ui(materials: Res<Assets<MarbleMaterial>>, mut text_query: Query<&mut Text>) {
    if let Some((_, mat)) = materials.iter().next() {
        let u = &mat.uniforms;
        for mut text in text_query.iter_mut() {
            **text = format!(
                "CONTROLS:\n\
                [Arrow Keys] Move Sphere\n\
                [W/S] Vein Frequency: {:.1}",
                u.vein_frequency
            );
        }
    }
}
Don't forget to add it to src/demos/mod.rs:
pub mod procedural_marble;
And register it in src/main.rs:
Demo {
    number: "3.6b",
    title: "Procedural Noise - Marble",
    run: demos::d03_06_procedural_clouds::run,
},
Running the Demo
Controls
| Key | Action | Description |
| Arrow Keys | Move Sphere | Slide the sphere. Try moving it inside the cube. |
| W / S | Vein Frequency | Change the density of the marble layers. |
What You're Seeing

The "Swimming" Effect: As you move the sphere, the veins don't travel with it; they slide across the surface. This visually proves that the veins exist at specific coordinates in the world (
in.world_position), like a cloud that the object is passing through.Seamless Intersection: Move the sphere so it overlaps the cube. Notice how the veins line up perfectly at the junction. This is the superpower of solid texturing - you can jam any number of objects together, and they will look like a single carved block.
Key Takeaways
Noise ≠ Random: Random is static; Noise is a smooth landscape.
Gradient Noise: The standard for natural looks. It interpolates slopes, not just heights.
FBM (Fractals): Realism comes from layering noise at different frequencies (Octaves).
Domain Warping: Distorting the coordinate space creates liquid, swirling effects.
World Space Texturing: Using
world_positioninstead ofuvallows you to texture objects seamlessly in 3D, creating the effect of solid materials like stone or wood.
What's Next?
We have mastered shapes with SDFs and textures with Noise. But there is a rendering technique that lets us simply delete pixels to create complex silhouettes like foliage, fences, or grates without extra geometry.
Next up: 3.7 - Fragment Discard and Transparency
Quick Reference
Concept Map
| Term | Analogy | Good For... |
| Value Noise | Minecraft Terrain | Blocky, retro effects. Cheap. |
| Gradient Noise | Rolling Hills | Clouds, water, terrain. The gold standard. |
| FBM | Coastline | Adding detail. Makes noise look "crunchy" or "fluffy". |
| Turbulence | Creased Paper | Fire, marble veins, lightning (using abs()). |
| Domain Warping | Oil on Water | Liquid, psychedelic, or gooey effects. |
Hash vs. Noise
Hash: Returns a single, chaotic, unrelated number. (TV Static)
Noise: Returns a value related to its neighbors. (Rolling Hills)
Value Noise: Interpolates random heights at grid corners. (Blocky)
Gradient Noise: Interpolates random slopes at grid corners. (Smooth/Natural)
FBM (Fractal Brownian Motion)
Layering noise to create detail.
Octaves: How many layers you stack. (More = more detail, more cost).
Lacunarity: How much the frequency increases per layer. (Usually x2).
Gain/Persistence: How much the amplitude decreases per layer. (Usually x0.5).
Noise Modifiers
Turbulence:
abs(noise). Sharp valleys. Used for: Fire, Veins, Lightning.Ridged Multifractal:
1.0 - abs(noise). Inverted valleys (sharp peaks). Used for: Terrain ranges.Domain Warping:
noise(p + noise(p)). Distorting coordinates. Used for: Liquids, Smoke, Marble.
2D vs 3D Noise usage
2D Noise: Use
in.uv. Good for surfaces, clouds, water planes.3D Noise: Use
in.world_position. Good for solid objects (wood, stone) or volumetric fog.


